Sunday, June 25, 2017

Sleeping In

We love our relaxing master bedroom and it really is a representation of both my husband and myself. I really wanted a contrast of colors and a balance of masculine and feminine styles in this space. I also like soothing neutrals in the bedroom… who am I kidding, I like soothing neutrals everywhere! We went with a deeper BM taupe color on the walls, darker wood furniture and off-white bedding and curtains.


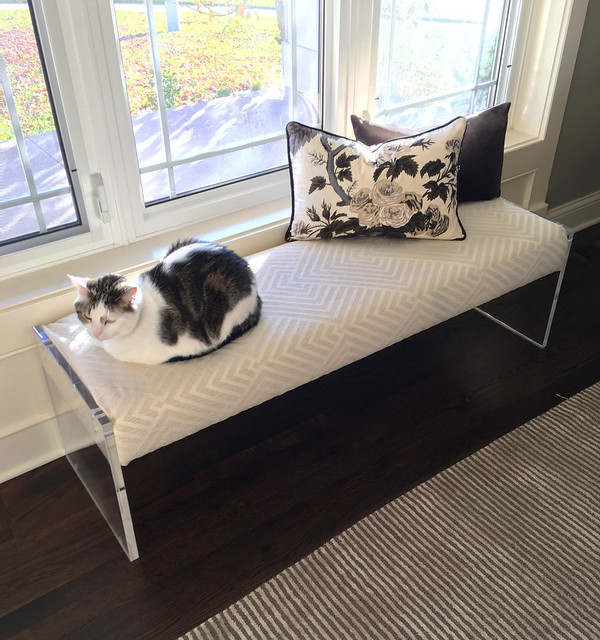
I’m all about linens in white or off-white. There is something about the light colors that always makes them feel so crisp and fresh. Baxter loves all of my bedding choices too!


Here are the details of our bed. The bedspread is a velvet channel quilt from Pottery Barn. Let me just tell you that switching from a duvet cover to a quilt has made life so much easier. There is no struggling to keep the duvet wrinkle-free and make sure the comforter stays evenly spread inside. This is a great quilt that you can throw in the washer and dryer. That was a must have with having fur babies! It is so easy to take care of and it looks great. Here is the link from Pottery Barn below.


Ok, on to the pillow shams. I chose shams from Restoration Hardware and they are from the Italian Hotel Satin Stitch Line. I just love the classic rows of satin stitch embroidery around the edges. I chose the ivory with black to coordinate with all of the colors in the bedroom. Monogrammed of course! This collection also comes in white with a variety of thread colors.


I am all about organic sheets and towels when possible. You spend so much time on these every night, why not be made with cotton that is organic. I try to make our house as toxin free as possible. That’s just something that is important to me. These are the sheets I went with in ivory. I also love a good monogram!


Ok, and last, but not least… throw pillows! My favorite and my husband’s least favorite. I tried to show a little constraint with the amount of throw pillows on our bed, so it was easy to actually make the bed every day, not just pretty for pictures. When I make the bed I just put our two sleeping pillows (1 King and 1 Standard each) behind the shams. Then to finish off the look two rectangular small throw pillows in front. Looks great, but super easy! I knew I wanted something a little edgier to balance out the traditional feel of the bed and bedding in here. That’s where Kelly Wearstler’s Channel fabric came in. I know it’s been used a ton, but I still love it. I think it is the perfect way to turn traditional in transitional.


I had Patricia from Southern Shades make the throw pillows for me. I chose to go with the double sided option and self cording. This is designer fabric so it is a bit of an investment piece, but to me they really are the star of the bed. Patricia makes really beautiful pillows and has high quality work. I totally recommend her if you are not a seamstress or if you don’t have anyone to custom make them for you. She has so many beautiful designer fabrics to choose from, and I love that she offers the cording option.


If there are any other details you are interested in knowing more about just leave me a comment here or on Instagram and I will be happy to get back to you!

Thursday, May 11, 2017

Family Room Furniture

I've been sharing pictures of our family room lately and have gotten a lot of questions about sources. I thought I would put together a post sharing all of the details on some of the big pieces in our room. So first up is our beautiful Bernhardt sectional.


I have always wanted a chesterfield style sofa because just love the classic rolled arms and tufted back. It really is the perfect tansitional piece, that can either go more traditional or modern depending on the accessories you pair it with. I just love the back tufting and the fact that it always stays neat and looks good.


Here is a view from our kitchen looking into the family room.


Our sectional is called the London Club by Bernhardt. I’m linking the page for the London Club on their site. It looks like it is still available through some online retailers if you search for it or if there is a Bernhardt retailer near you. I would also like to point out that you can get the London Club in a sofa or loveseat if you want something smaller. This is a very large piece, which was great for us, but maybe not for everyone. My husband and I like to have plenty of room to spread out and the pets need their space too. This is the perfect piece for all of us! Check out the details below.


I originally wanted to go with a linen fabric because I love the look, but our wonderful saleswoman talked me out of it. She suggested going with more of a blend, or poly-blend fabric because it would be easier to keep clean. Let me just say that was some of the best advice! This piece of furniture gets used more than any other in the hosue and it’s still a beautiful off-white. We just spot clean and it’s held up great. With two adults, a dog, and two cats it’s amazing how great it still looks! Here is the fabric we chose below. I pulled the actual swatch from Bernhardt’s website, but am also including a close-up picture of our sofa.


Nailhead Color


Wooden Legs


I’ve also had a some questions about our coffee table. I am including a link where you can find it. I think the legs are what make this piece really unique.


The table has this really cool lift up feature that makes it easy to eat a snack or work on your laptop!


I'm also including the details on our rug. Here's a close-up.


It is made by Loloi and called the Nyla rug. I have it in the slate color way. It is a warmer blue with hints of gray. The colors look much better in person than on some of the online pictures. You can get a better idea of the overall pattern below.


Let me know if there are any other pieces you want to know more about and I'll be happy to let you know sources!

Saturday, April 15, 2017

Easter 2017

Happy Easter weekend! I thought I would share my decor, table setting details and some great recipes I'm using this weekend.


For these cute coconut macaroon nests find the recipe here. I then put some of the new white mini cadbury eggs in them.

Instead of a table runner I found a really great wrapping paper and used that instead of a runner or tablecloth. It’s an easy option to add a little pattern to your table that doesn’t cost a lot! I also picked up those cute little bunny place card holders in the Target dollar spot. They were $3.00 for two!

Placemats from ZGallerie


For the cake topper I found a bunny ear wire headband at Target and then wrapped it in a cute yarn and made a base to attach flowers to. You could also achieve a similar look with pipe cleaners!


This cake is a Paleo Maple Carrot Cake. It was created by Jenni Hulet of the Urban Poser. If you eat Paleo you must get her cookbook for baked goods… The Paleo Patisserie. It is so good!!! Below is the recipe. For my cake I changed the icing to a maple buttercream. I just used Kerry Gold butter, maple syrup, and a little arrowroot powder to create it. I also used a smaller shredded coconut on the outside.


Instructions care of the Mommypotamus.
For this recipe you will need three 6-inch (15-cm) round cake pans, as the recipe is written for that amount of batter. However, this amount of batter will also make one 9-inch (24-cm) round cake for a nice single-layer cake if desired. I just used two 6-inch because I didn’t want as tall of a cake.
Author: Jenni Hulet from My Paleo Patisserie
Recipe type: Dessert
Cuisine: American
Serves: One three-layer (6-inch/15-cm) round cake (serving 12 to 15)
INGREDIENTS
For the cake:
¼ cup (45 g) palm shortening or ghee
4 large eggs
1 large egg white
1 cup (200 g) firmly packed maple sugar (where to buy maple sugar)
1 teaspoon lemon juice
3 cups (350 g) almond flour (where to buy almond flour)
1 teaspoon ground cinnamon (where to buy organic cinnamon)
¾ teaspoon ginger powder (where to buy organic ginger powder)
½ teaspoon ground nutmeg (where to buy organic nutmeg)
½ teaspoon baking soda (where to buy baking soda)
½ cup (40 g) unsweetened shredded coconut (where to buy shredded coconut)
⅓ cup (50 g) raisins (where to buy organic raisins)
⅓ cup (60 g) chopped pineapple
⅓ cup (40 g) chopped pecans (where to buy pecans)
3 medium carrots (260 g), grated
3 cups (170 g) coconut flakes, for garnish (where to buy organic coconut flakes)
For the buttercream:
3 large egg whites, room temperature
¼ teaspoon cream of tartar or lemon juice
¾ cup (180 ml) maple syrup (where to buy maple syrup)
1½ cups (270 g) palm shortening*, room temperature
1 teaspoon vanilla extract (where to buy gluten-free vanilla extract, how to make vanilla extract)
INSTRUCTIONS
Preheat the oven to 325°F (163°C). Grease and line the cake pans with parchment paper circles cut to fit the pans.
Melt the shortening in a small saucepan over low heat, then set aside to cool. In the bowl of a stand mixer fitted with a whisk attachment, beat the eggs, egg white, sugar, and lemon juice on medium-high speed for 15 minutes. The mixture should become thick and voluminous. Always beat it for the whole 15 minutes, though.
While the egg mixture is beating, whisk together the flour, spices, and baking soda in a large bowl till blended. Add the shredded coconut, raisins, pineapple, pecans, carrots, and melted shortening, then toss to combine.
When the egg mixture is ready, gently fold it into the flour mixture till completely incorporated. Divide the batter evenly among the prepared pans and bake for 30 to 35 minutes or till the tops spring back when gently pressed. (Bake for 35 to 40 minutes if using a 9-inch/24-cm round cake pan.)
Remove from the oven and let cool in the pans for about 10 minutes. Loosen the edge of each cake with a sharp knife, then turn the cakes out onto a wire rack and let cool completely before assembling.
Once the cakes are have cooled, prepare the buttercream. Combine the egg whites, maple syrup, and cream of tartar in a large heatproof bowl. Place the bowl over a small or medium-sized saucepan with 2 inches (5 cm) of simmering water in it. It is important that the bottom of the bowl does not touch the water. Heat the mixture till it reaches 160°F (71°C) on a candy thermometer, whisking constantly so the eggs don’t curdle or seize.
Remove from the heat and transfer the mixture to the bowl of a stand mixer fitted with a whisk attachment, or use a metal bowl and a hand mixer. Start whipping on low speed, gradually increasing to high over the course of 30 seconds. Continue to beat the mixture on high speed till stiff and completely cool. This could take up to 8 to 10 minutes, or longer if using a hand mixer.
When the meringue is ready, switch to the paddle attachment on the stand mixer. Add the shortening bit by bit, beating on medium-high speed till thick and smooth. Beat in the vanilla.
If the buttercream becomes loose and liquid, your meringue may not have been sufficiently cool when you added the shortening. Chill the mixture slightly in the fridge, then resume beating. It will emulsify eventually. If it curdles, the shortening may have been too cold. No worries! Don’t fret or throw it out; just keep beating! Beating the mixture fixes pretty much everything.
To assemble the cake: Place the first cake layer on a plate or cake stand. Spread about a ¼-inch (6-mm)-thick layer of buttercream evenly over the cake. Place the second cake layer on top of the buttercream, then spread more buttercream on top. Finally, place the last cake layer, then frost the top and sides of the cake with the remaining buttercream. You don’t need a super thick layer, but you want enough buttercream to press the coconut flakes into.
Scoop up handfuls of coconut flakes and gently press them into and all over the surface of the cake.
For best results, chill the cake, uncovered, for about 30 minutes to secure the coconut flakes. If needed, fill in gaps by placing a little frosting on the back of a coconut flake and securing it to the area.
NOTES
*To substitute ghee, use an equal amount by weight. If measuring by volume (cups), reduce the amount of fat used to 1 cup plus 2 tablespoons.

Monday, January 9, 2017

MGBW Home Sale

I just had to share a table I bought from the Mitchell Gold and Bob Williams sale going on right now. I've been looking for a little pull-up drink table for alongside our sofa. We use an ottoman for a coffee table and I really wanted a little table to set drinks on. I was looking for a brass table to match our MGBW brass Avery chairs, and this was just perfect. The price is incredible right now, especially for the quality you get!

Here is the table pictured in our space.


It is a shiny brass metal with a smoky glass top.

It's called the Dax Round Pull-Up Table
It was $515 and now $206! This is such a good deal!
They also have it in a square version for the same price.


I posted a couple others that I thought were also stylish and a good deal!
The Beverly, because you just can't go wrong with lucite and brass! This is more of a satin brass.
Was: $455 Now: $364


If you are looking for a table that would slide under a sofa or sectional this is a great deal.
The Cece, is an antique brass finish with a black glass top.
Was: $385 Now: $154


Christmas 2016 at Home

I wanted to share some of our Christmas Decor. I mainly decorate two rooms in our house... the formal living room and our family room. I'm starting first with our formal living room. This room has extremely high ceilings so I love being able to decorate a 10 foot tree to put in here. I chose to go with all whites and metallics for the decor in here this year, and really love it!


Baxter patiently waiting for his presents to be put under the tree.
 

Our mantel below. I wanted a little bit more simple decor for the mantel eight the white on white stockings and the more natural looking garland with some hints of sparkle.


 A close-up of the tree and some presents below.
 

All lit up at night!
 

Our family room is below. In here I put a smaller flocked tree with lots of metallic ornaments.
 

It sits in a snowy basket.


Our little guy modeling by the tree.


Thursday, November 10, 2016

One Room Challenge Fall 2016 || WEEK SIX REVEAL

It's here!!! Wow, these six weeks have flown by! First and foremost I must thank Linda of Calling it Home for putting together this incredible, wonderful, stressful, fun challenge! You must check out all of the featured designers that revealed their rooms yesterday. So many amazing spaces! I'm actually out of town right now, and there have been a few technical issues, but I think we are all good now!
Ok, so let's get on to the good stuff.


So before I get too far, let me start with the before shots so you can see how far we have really come.


You might notice that the fireplace has changed a little!


Back to the new and improved goodness...


Full room view


Here is our entryway looking into the room


Looking back from the fireplace


This is the view looking down from the second story. The light coming in from the windows makes this one of my favorite rooms!


This is how the bench will really be used...


Thank you so much for stopping by and supporting me on this challenge! I hope you like the new room as much as I do. I will be sharing more soon, especially some details about our DIY fireplace makeover. You must go check out the other linking participants here!
I'm including a list of sources below.
If you don't find something you are looking for please feel free to leave a comment and I will respond!

Sofa || Chairs || Ottoman || Console || 
Bench (I recovered in my own fabric || 
Gold mirrored table || Sofa drink table || Stripe Rug || Orchid